In the Assembly steps tab all assembly steps of a ProKon analysis are displayed. The area is for viewing or entering data.
An analysis contains one or more assembly steps. The order of the assembly steps can be changed at a later time (step up / down).
Using the Assembly steps ribbon or the context menu, assembly steps can be converted into elements, and elements broken down into structure lines. The same options are available for this as for MTM analyses (see Structure).

Assembly steps of a ProKon analysis
All information relevant to the assembly steps can be entered in the tabular view.
The detailed view supports the user in following the rules regarding input. By clicking the  button in the ribbon, all available categories (analysis criteria) for the selected assembly step are displayed in the right part of the window.
The type and number of columns and the available categories depend on the selected structural behavior.
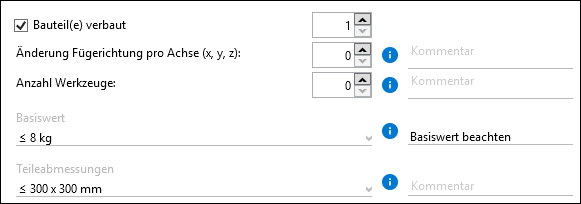
The detailed view simplifies the input and provides help via various buttons. The respective help buttons ![]() can be used to call up further details and notes on the analysis criteria. If the input values or conditions are not suitable for an easy and safe assembly, the help button changes to the following buttons:
can be used to call up further details and notes on the analysis criteria. If the input values or conditions are not suitable for an easy and safe assembly, the help button changes to the following buttons: ![]() or
or ![]() . By clicking on the respective button, it is also possible to call up the Help. The yellow symbol stands for a warning, the red symbol as an input error.
. By clicking on the respective button, it is also possible to call up the Help. The yellow symbol stands for a warning, the red symbol as an input error.
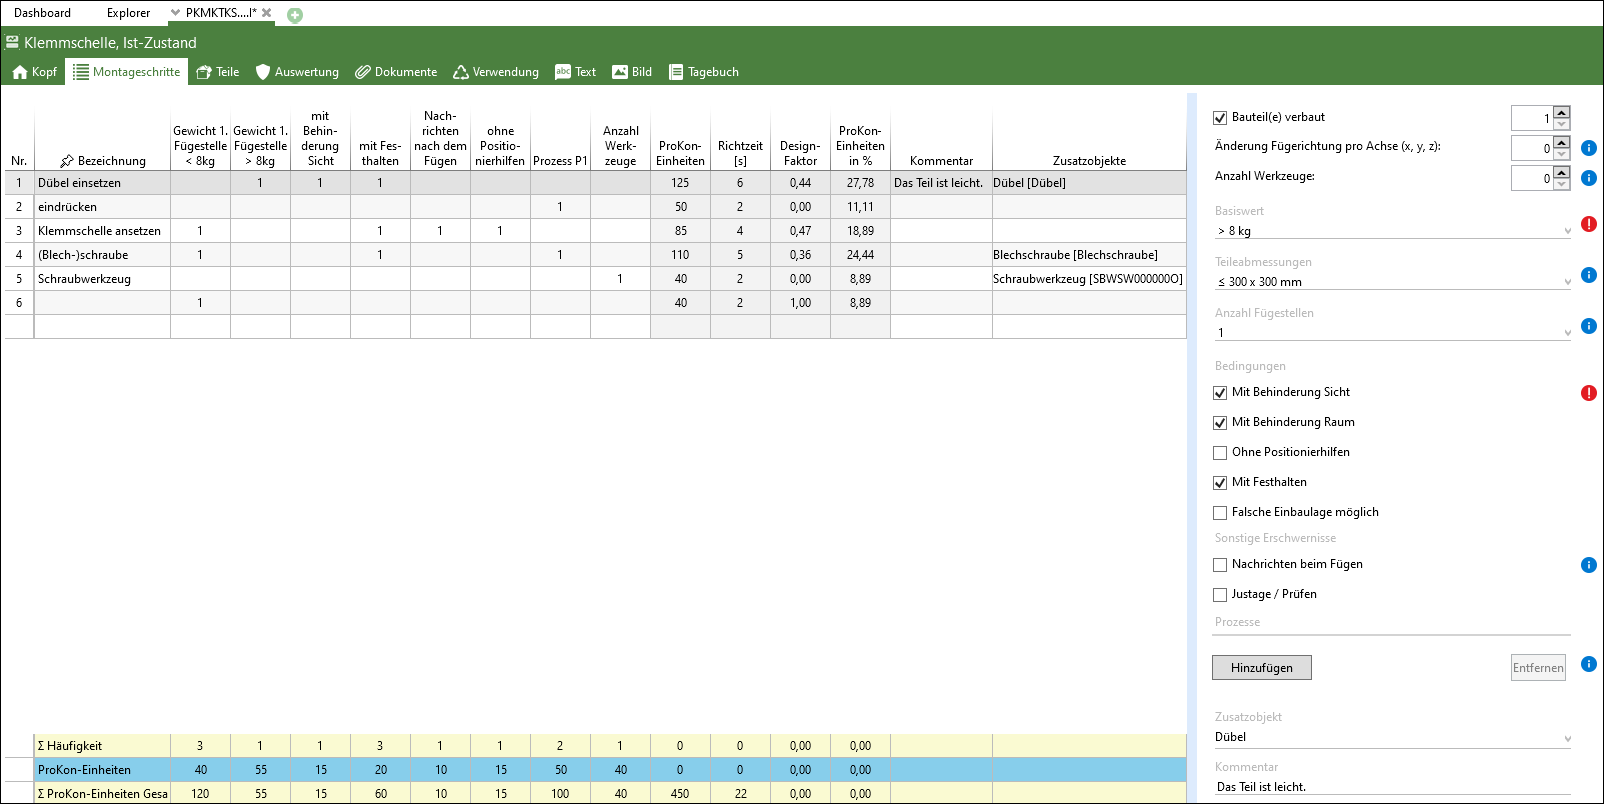
Assembly steps tab, with detailed view for the assembly step 'Insert dowel' and totals row
Check box "Display totals row"
The "Display totals row" option in the Structure ribbon in the View area displays the total row in the structure.
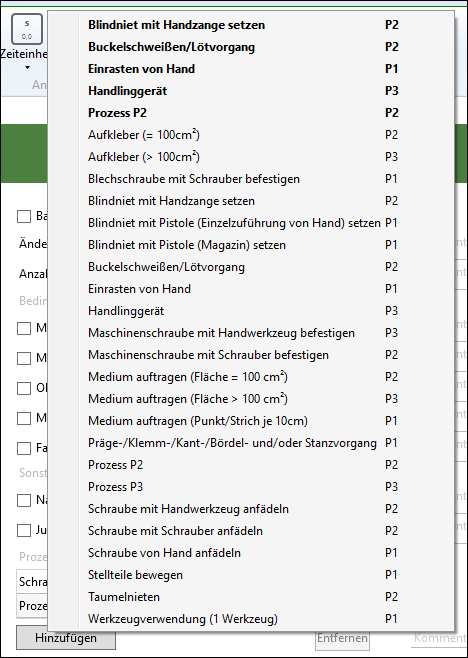
Processes can be assigned to an assembly step. By clicking on Insert in the detailed view, one process can be added to each assembly step. This opens a list of all possible processes stored in TiCon. The list of processes is already filled with initial data in delivery state. In order to ensure a high level of flexibility, the list can also be changed or expanded in the administration (see Processes). The 7 most recently used processes are shown at the top of the list. They are shown in bold and are saved in an element-configuration specific and user-specific form.
Processes in ProKon The added processes are displayed in a table with process description, category (P1, P2 or P3) and number:
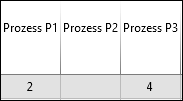
Selected processes in the detailed view In the process columns they are grouped according to category and assigned to the corresponding column.
Processes displayed in the columns |
You can also insert or edit additional objects (parts) in the structure (Additional objects column) or in the detailed view (drop-down list). If the part has a number > 1, the number of "Part(s) assembled" and the number of assignments are increased in the assembly step so that the part is completely assigned (not assigned = 0). If the number of parts is reduced, the number is also adjusted int the assignment, so that parts are then "released" again. The assignment in the Additional objects column is the same as the assignment for MTM analyses.
If a part is assigned, additional properties of the parts (criteria) can be displayed in the Assembly steps tab (e.g. dimensions). You can also assign additional objects in the Parts tab. |
In each analysis step, comments can be entered for each assembly step. The following two options are available: •Enter comment in comment field, if the detailed view is shown
Enter comment in the comment field in the detailed view •Enter comment in the comment column, if it is active  Enter comment in the comment column In addition to the general comment per assembly step, it is possible to enter further comments per each influencing variable:
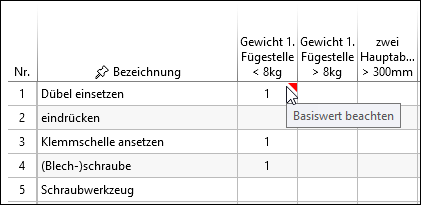
Comment for the influencing variable basic value •Cells with a comment have a red triangle in the top right-hand corner. •The comment text is shown in the cell tooltip.
Cell with comment Deleting the text in the comment field removes both the comment and the red triangle. |
