For creating a process design, the following functions are provided:
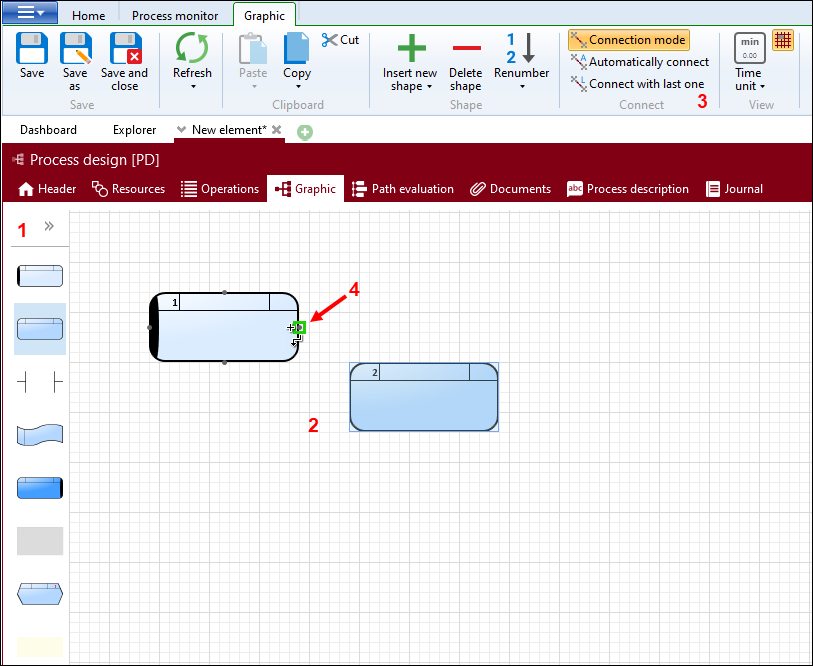
Select the appropriate shape by using drag & drop from the shape bar (1) and position it freely in the work area (2).
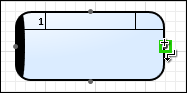
After positioning the shapes, they still need to be connected. To do this, activate the connection mode in the "Connect" area (3) of the ribbon and connect one shape to the other via the small squares (4).
If there is not enough space to draw your process design, you can add a further page by inserting a shape on the edge of the work area.
Positioning and connecting the shapes
Previously created arrows can be held with the mouse at their ends and moved. Switching to connecting mode is not necessary.
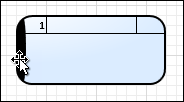
With the cross cursor, operation areas can be moved vertically and single shapes can be moved within the work area (2).
With this cross the separate shapes of the process design can be connected to each other.
If the "Automatically connect" option in the ribbon (3) when creating new shapes (process step shape, decision shape, etc.), the single shapes will directly be connected with each other. For this purpose, the cursor moves automatically from the nearest shape to the newly positioned one.
In the ribbon under View, there is the positioning help Align on grid lines ![]() .
.
Marking multiple objects
- draw a rectangle with pressed mouse button around all objects that have to be selected (connection mode must be disabled)
or
- hold down Ctrl-key and select separate shapes via mouse click
or
- use CTRL+A to mark all existing shapes, lines and comment fields
Change properties
The "Properties" window is displayed automatically for each shape or element. Depending on the selected element, different properties are available that can be adjusted or added to (see "Grafik", "Properties" window).
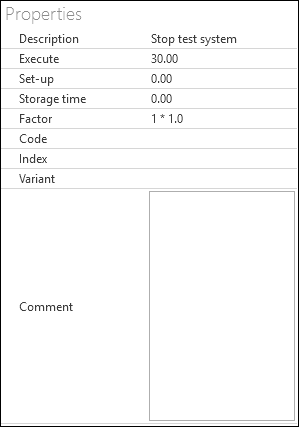
Properties of a process step shape
It is also possible to work with "Rückkopplungen".